الجمعة، 28 سبتمبر 2012

CompTIA increasing exam security

CompTIA logoIn a recent announcement by CompTIA, all test-takers around the world will be required to have their photo taken and signature recorded in order to be allowed to take the exams.

These changes will affect all Pearson VUE testing centers and will be taking effect from December 1, 2012 on-wards.

In the announcement they stated that "These security enhancements align with CompTIA's commitment to preserving the integrity of the testing process and protecting the value of CompTIA certifications. In addition, these changes will increase the validity of all CompTIA certifications held by individuals."

What's new on Dynamics NAV 2013?

Microsoft Dynamics NAV 2013 is now Released to Manufacturing (RTM) and is bundled with many new features. But before we start, for those of you don't know...

What is Dynamics NAV 2013?
Microsoft Dynamics NAV 2013 logoDynamics NAV is part of a range of ERP (enterprise resource planning) products offered by Microsoft. Some of you might have known it as Navision Solutions before it was re-branded by Microsoft in 2005. NAV was designed for small and medium-sized enterprises intended to assist them with the following business sectors:
  • Finance
  • Manufacturing
  • Customer relationship management
  • Supply chains
  • Analytics
  • Electronic commerce
When Microsoft released Dynamics NAV 2009, it saw a huge success within mid sized companies due to its effectiveness and easy customization of the software.


NAV 2009 was the last release, making the 2013 edition a highly anticipated piece of software within many organisations. The release of the RTM is showing many of the new features that will highly increase the productivity of any company. It is the first of any ERP products to embrace cloud technology through Windows Azure. 

Max Beuker from Microsoft recently blogged: "Microsoft Dynamics NAV 2013 is a landmark release, building on a strong product foundation to deliver new levels of customer and partner value through faster, more efficient implementations, compelling new and enhanced application functionality, and unparalleled levels of customer choice on how to deploy and access the solution".

Whats New on NAV 2013?
Many new features have been released. In the RTM announcement, they stated: "Dynamics NAV 2013 has powerful and diverse new application functionality, ranging from charting to cash flow analysis to time sheet registration to assembly to expanded out-of-the-box RoleCenters to Unicode". Another post stated the following: "The user experience innovations range from the SharePoint and web clients to end user productivity features on the rich client to improved integrations with OneNote and Excel."

Among all of the features, here are the key ones them:

  • Changes to the RoleTailored Client
  • Warehouse Management features, redesigned or enhanced
  • In the supply planning a number of features has been redesigned or enhanced
  • Job module enhancements
For more information on whats new, visit the MSDN web-site from Microsoft here, or use our web-site for an in depth view of whats new on NAV 2013 here.

Firebrand has released two new NAV courses with certifications. NAV 2013 Financials and NAV 2013 Developer. 
Microsoft Dynamics NAV 2013 logo
Gaining your Dynamics NAV Financials certification will demonstrate that you have the know-how to help your company handle key financial functions, including cash management, budgets, the management of VAT, journal development, transactions, the general ledger and receivables and payables management. It would only take you 6 days to gain your certification.

Gaining your Dynamics NAV 2013 Developer certification will demonstrate that you have the skills and knowledge to to do the following in your organisation: Use C/AL (Client / Application Language), program in C/AL, write C/AL statements and expressions, debug C/AL, use custom controls with C/AL, extend Microsoft Dynamics NAV Using COM, use the Development Environment and designing applications, develop for multiuser environments, and use multilanguage functionalities. It would only take you 8 days to gain your certification.

There are two areas to focus on when integrating NAV 2013 into a company:

Firebrand has also released two new courses focusing on these two areas. You will get an in depth insight into the new functionality of Microsoft Dynamics NAV 2013 development, installation, application and use with a view of all the new features with a hands-on experience. The courses only last 3 days and 2 days respectfully.

الثلاثاء، 25 سبتمبر 2012

What are the new ISO 22301 certifications?

ISO LogoISO 22301 is the new international business continuity standard. It was released in May this year and has replaced the older British standard: BS25999-2.

Two courses have been released inline with 22301:
What is ISO?
ISO stands for and is the International Organization for Standardization. It is the world’s largest developer of International Standards. They were founded in 1947 and now have more than 19,000 International Standards covering nearly all sides of technology and business. This includes:
  • Food safety
  • Computers
  • Agriculture
  • Healthcare
  • Plus much more...
So why get an ISO 22301 certification?
Gaining this cert will demonstrate to your employer that you have the skills and knowledge needed to implement or audit a Business Continuity Management System (BCMS) based on the new ISO 22301 certification.

You will learn the necessary know-how to complete an audit. These are some of the areas covered in the ISO courses:
  • Mastering audit techniques
  • Managing audit teams and programmes
  • Communicating with customers
  • Conflict resolution
  • Business continuity management specification
  • Guidelines for information and communication technology readiness for business continuity
According to itjobswatch.co.uk, the average salary for an ISO professional is £50,000.

Get certified with the latest ISO certification in just 3 days! Just choose your cert to find out more:

ISO 223001 - Lead Auditor

ISO 223001 - Lead Implementer

What is TOGAF?

TOGAF LogoTOGAF stands for The Open Group Architecture Framework. It is a methodology and a set of supporting tools specifically for fields in enterprise architecture. 

What kind of architecture is TOGAF designed to support?
TOGAF splits Enterprise Architecture into four main areas. You'll learn about all of these on the course:
Business Architecture – processes, design and optimisation
Applications Architecture – creating strategic architectures
Infrastructure Architecture – networks, hardware, security, server locations, operating systems and capacity
Data Architecture – placement, requirements, maintenance and reporting

If you're an architect who is looking for an introduction and / or to achieve Level 2 certification - this is the course for you. The current and latest version is TOGAF 9 which is part of the the leading Open Enterprise Architecture standard.


How do I get a TOGAF certification?
To gain a TOGAF certification, you will need to complete two exams following your TOGAF training course:
  • Level 1: TOGAF 9 Foundation
  • Level 2: TOGAF 9 Certified

What are TOGAF employment possibilities?
These days there is a high level of interest in Enterprise Architecture making TOGAF one of the most desirable architecture based certifications. You could work directly for organisations such as banks, manufacturers, retailers, government agencies, etc... or you could work in an Enterprise Architecture consultancy. Most large corporations now have their own architecture consultancies including HP, IBM, Cap Gemini, and many more... all currently recruiting.

Acording to itjobswatch.co.uk, the average salary for a certified TOGAF professional in London is £75,000 and can go as high as £90,000 in certain areas in the UK.

Earn your TOGAF certification in just three days with Firebrand training - click here to find out more: http://www.firebrandtraining.co.uk/courses/the-open-group/togaf-certification

الاثنين، 17 سبتمبر 2012

BCM Certifications: ISO 22301 Webinar


continuity central logo

Following the announcement for the widely anticipated ISO 22301, ContinuityCentral.com will be hosting a free webinar tomorrow (Tuesday 18, Spetember 2012), called ‘The What, How and Where’s of BCM Certification.

It will provide an introduction and overview of the new ISO 22301. Topics included are as follows:

       ·         Status on global adoption rates
       ·         Status od BS25999 and other standards, in the US
       ·         How dows ISO22301 fit within the PS-Prep Program?
       ·         Transitioning to ISO 22301
       ·         The value of this certification

The presenter will be John Dimaria (HISP, AMBI, Six Sigma Black Belt) Product Marketing Manager, BSI Group America inc.

IS0 22301 logoThe seminar will start at 4:00pm (-0:00 GMT) and will last 1 hour, which includes 15 minutes of Q&A.

To register for the live webinar, click here

This ISO standard builds on one of the most successful management standards. The associated guidance documents, ISO 22313, are currently in draft production and will be available later in the year or in early 2013.

(ISC)2 release the i-dition


(ISC)2 logo

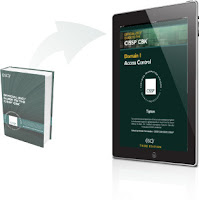
Say goodbye to carrying heavy and inconvenient text books for your CISSP course, all the information you need is now available on your iPad or iDevice.

The Official (ISC)2 Guide to the CISSP CBK, Third Edition, is now available through iTunes. This new app gives you more options, more convenience, more interaction and more preparation for your CISSP exam.
(ISC)2 Guide to the CISSP CBK, Third Edition 
“The new Third Edition has been updated to reflect the latest developments in information security and provides a straightforward approach to the CISSP CBK. Numerous illustrated examples and practical exercises are included to help you not only understand the concepts but also apply them in real-life.”

You can now download the two domains below for $12.99 each through iTunes.

·         Access Control


السبت، 15 سبتمبر 2012

Trabajando con vectores en el AppBar de Windows 8 con Blend y Metro Studio

Hola

Aprovechando que me encuentro trabajando en Sugges.me y aprendiendo cosas del Blend para Windows 8, les quiero mostrar algo bonito que se puede hacer usando Metro Studio 2 de Syncfusion, el cual es gratuito.

Voy a empezar por enseñarles como trabajar con la barra de aplicaciones desde Blend. Como siempre mi recomendación es que si bien tenemos que aprender XAML, definitivamente Blend nos hace mucho más productivos y nos puede ayudar con detalles que no recordemos del XAML.

Actualización 2012/09/29
Este procedimiento puedes realizarlo cuando requieras hacer tus propios botones. Recuerden que para la versión de lanzamiento de Visual Studio, en el archivo StandardStyles.xaml en la carpeta common se encuentran comentariados algunos estilos de botones básicos.

En primer lugar ubicamos en Blend en los objetos el Top o Bottom AppBar y ahí agregamos desde los controles un AppBar.


Como ven este ya está formatado con la estructura típica, 2 stackpanels alineados a izquierda y derecha respectivamente.


Ahora procedemos desde la zona de controles a añadir un botón.


Al soltar el botón en el lugar que corresponde ocurre que este no tiene el formato de un botón de barra de aplicaciones.


En versiones anteriores de Blend encontrabamos una serie de botones con estilos predeterminados, yo no he podido volver a encontrarlos, el unico que aparece es uno genérico AppBarButtonStyle.


Mi recomendación con este y con cualquier estilo y plantilla que venga por defecto es que la editemos como copia para poder personalizarlo


Y para que los distingan de los demás estilos un consejo más es que pongan el nombre de su aplicación o algún distintivo a sus estilos y templates, además de que los guarden en un archivo de recursos independiente. 


En la plantilla nos importan 2 elementos importantes el etiqueta del botón y el contenido en el cual la plantilla por defecto ubica el texto asociado al formato base del botón, cosa que no queremos en un botón de AppBar.


Pues bien, lo primero que corregiremos es lograr que el content que es el texto de un botón base se ubique en la etiqueta de la parte inferior del botón y para esto debemos editar el binding de la propiedad Text.


De esa forma observamos como el texto se asocia a la posición donde la necesitamos. No lo edites aqui, cuando terminemos la edición este campo queda para configurar en Blend.


Como vemos, nos falta una imagen asociada y es ahí donde entra Metro Studio 2. En el podemos encontrar cantidades de imágenes, buscamos la que mejor se asocia a nuestro comando y la editamos.


Allí tenemos multiples opciones de edición, seleccionamos fondo transparente y el tamaño de imagen que queremos.


Luego la exportamos y guardamos en la carpeta de nuestro proyecto,


Además a través de Blend, o como en la imagen a través de Visual Studio, incluimos la imagen en nuestro proyecto. 


Yo acostumbro tener los dos entornos abiertos al tiempo Blend y Visual Studio, cada uno es bueno para algo específico, sin embargo el Visual Studio 2012 permite en ocasiones intervenir de forma más facil algunos elementos cuando se encuentran en el archivo de la página y no en archivos de recursos. Un ejemplo de eso es la cabecera de los grupos en la platilla tipo grid, puesto que la plantilla por defecto tiene en esa cabecera un evento de clic asociado y por tanto tienen la plantilla dentro de la página, les invito a intentar cambiarle el color a la fuente del título de grupo desde Blend y desde Visual studio para entender mejor de lo que hablo.

Recuerden si incluyen el archivo desde Visual Studio, guardar y cuando Blend les pregunte si desean recargar, aceptarlo. Esto los sacará de la edición de la plantilla como fue mi caso, para volver, nos ubicamos en el botón y esta vez no le decimos editar una copia si no, editar el actual.


Ahora añadimos una imagen dentro del content del botón, como ven el mensaje indica que se reemplazará el string que habia antes.


En las propiedades de la imagen seleccionamos la nueva imagen que ya debe estar cargada si la incluimos correctamente en el proyecto.


Ahora, salimos de la edición del botón para ver como quedó en el diseño final.


Si observaramos la página en tamaño real, veremos que se ve muy bien, además de que en esta vista ya podemos editar el texto del botón, pero si ampliamos la imagen, vemos que la imagen se torna borrosa. Podríamos cambiar la imagen por una de mayor tamaño, pero lo mejor sería usar vectores, de tal forma que no añadamos peso extra a nuestra aplicación y que ella pueda escalar y adaptarse con elegancia.


Para esto nos ayuda otra vez Metro Studio, el cual tiene una opción para exportar el XAML de la imagen que seleccionamos.


Tomamos el código generado por Metro Studio.


Y lo ubicamos en el lugar donde antes habiamos colocado nuestra imagen. Les recomiendo mucho identar el codigo para que no se desordene.


Como vemos, la imagen no se ve correctamente necesitamos añadir márgenes.


Nos ubicamos en el Grid y añadimos márgenes, en mi caso con 8 a cada lado quedó perfecto. Vemos desde aquí como la imagen a pesar de ser tan grande, no se torna borrosa, justo por que es un formato de vectores.


Aquí está como se vé ahora en la vista del diseño final, esto además nos evita manejar tantos archivos de imágenes extra.


Lo más importante de las plantillas es que seamos consientes de que las tendremos a disposición así que si decidimos añadir otro botón de editar en otra pantalla, simplemente añadimos un botón normal y seleccionamos la plantilla que ya creamos.


Y ahora para crear un botón con otra imagen, podemos partir desde nuestro botón, generando una copia del estilo y simplemente cambiando el XAML de la imagen.


Muy bien, eso es todo, espero que les sea de utilidad en alguna ocasión. Hasta la próxima.

Sorey

Actualización 2012/09/22: Quiero contarles que la alineación de los iconos centrales con otras imagenes me quedaba desbalanceada ( :P ) bueno eso a mi ojos que le gustan las cosas bonitas. Razón por la cual me tocó editar todo el botón hasta dejarlos como quería, este proceso es un poquito más complejo y prefiero explicarlo en video. Les muestro el efecto en los botones.


Como ven quedan mucho más pulidos, el problema es que con este cambio toca editar todos los estados del botón, para que se vea bien cuando con los gestos del mouse, es decir:

Cuando el mouse pasa encima

Cuando el mouse presiona el botón

Esto hay que hacerlo tambien para mostrar el botón desactivado. Les comparto además dos enlaces para aprender a usar las barras de aplicación según las guías de diseño de interfaces modernas

Diseño de navegación para aplicaciones estilo Metro 
http://msdn.microsoft.com/es-es/library/windows/apps/xaml/hh761500.aspx 
Diseño de comandos para aplicaciones estilo Metro 
http://msdn.microsoft.com/es-es/library/windows/apps/xaml/hh761499.aspx

الاثنين، 10 سبتمبر 2012

WIN a $20,000 American Express Travel Voucher + many other prizes

Windows Server 2012 Logo
Windows Server 2012 has officially been released and to celebrate, Microsoft set up a competition; The Launch Game.

The game consists of earning points by consuming and sharing content. “Every action that allows you to earn points is labelled with that action’s point value. The more you learn and participate, the more you can earn! Earning points moves you up the leader board.”

The Launch Game

“Actions include but are not limited to: downloading Windows Server 2012 trial, enabling your Facebook and/or Twitter account in your Profile settings, liking the Windows Server page on Facebook, following the Windows Server Twitter account, watching keynote videos and technical sessions, submitting questions and comments, attending Ask the Experts sessions, and more.

Windows Server 2012 Launch Game Grand PrizeBased on your final leader board position, you can be entered to win the Grand Prize ($20,000 American Express Travel Voucher + 2 Tickets to any TechEd 2013 Event) or a prize in Tiers 1-3 which includes a number of prizes such as 6 Month Windows Azure Plan, $5,000 American Express Travel Voucher, HP ENVY TouchSmart Ultrabook 4 with Beats Solo HD Headphones, Windows 8 Tablet, 4GB Xbox 360 Console with Kinect Bundle and more.

The contest ends on October 8, 2012. Good luck.

Certified CompTIA Network+ technicians recruited by Apple

Smartphones and tablet computers are being seen as the future making the demand for certified technicians with the understanding of building services and apps for iOS, Windows Phone and Android devices like the iPhone, iPad, Samsung Galaxy S3 and Nokia Lumia.

In a recent survey by Computerworld studying the hiring trends in 2012, it was found that 61% of IT executives are looking to hire technicians with skills, knowledge and certifications in programming and application development.

In another recent study by CompTIAcalled “Trends in Enterprise Mobility”, it was found that companies are focusing more on smartphones and tablets rather than normal mobile phones. Thanks to these changes, companies like Apple are now recruiting more and more technicians for their Apple Consultants Network (ACN), which is a group of independent service providers and consulting firms who supply on-site services for Apple and general support for home users and businesses.

CompTIA Network+It’s been almost a year now since the ACN started to accept the CompTIA Network+ certification as a prerequisite for their program and many people have benefited.


CompTIA Network+ certified IT technician, Jonathon Praay from Preferred Computers stated: “When we were first approached about joining the Apple Consultants Network and getting the Mobility Competency, I noticed that CompTIA Network+ was now an accepted prerequisite. A few weeks later, I was enrolled for the next CompTIA certification class in my area," he added that "Mobile computing solutions are built on the networks they operate on; so when these topics came up in class I had no trouble grasping the concepts and challenges. This class helped me see yet another exciting application of my network knowledge in a relatively new area."

Apple LogoAs mentioned in a previous blog post, CompTIA Network+ is now an ISO, ANSI accredited and an internationally recognised certification. It shows that the technician has the skills and knowledge needed in order to implement defined network architectures with network security.

Jonathan Praay was able to use his Network+ certification to help him gain Apple’s Mobility Technical Competency Designation (MTC). The MTC is designed to certify that the Apple consultant has the necessary knowledge of the Apple mobile platform. Jonathan Pray added that “the CompTIA Network+ certification really enhanced my network knowledge, something I use every day," 

"As my experience continues to show me, this certification gave me a foundation to build on. I learned the basic standards and concepts as well as troubleshooting methods."

He continued to state that he “would recommend CompTIA Network+ to anyone who will ever configure/design/sell/manage Apple devices for a business to get their Apple Mobility Competency”

“I think its great when different organizations such as Apple and CompTIA can work together to find ways to reach a greater number of IT professionals with new and innovative programs."Description: http://feeds.feedburner.com/~r/CompTIACerts/~4/zr5gPRvvuck?utm_source=feedburner&utm_medium=email

الأحد، 9 سبتمبر 2012

Trabajando Bases de Datos locales SQLite en Windows 8

Hola a todos

Aprovechando que hoy ando trabajando por estos días con Windows 8, hoy les traigo este tema que nos hizo sufrir a más de uno mientras esperabamos el RTM, en realidad esperabamos ansiosamente el wrapper de SQLite sin saberlo.

SQLite es una biblioteca de software que implementa una en sí misma, sin servidor, sin necesidad de configuración, el motor de base de datos transaccional de SQL y su código fuente es de dominio público.

Pues bien, SQLite ahora está disponible para nuestras aplicaciones Windows 8 que requieren almacenamiento estructurado local. El dolor que teniamos es que hasta ahora no existia una implementación de un wrapper estable y aprobado por Microsoft, que nos permitiera usarlo en nuestras apps. Soy enfática en el tema de aprobado por Microsoft puesto que ya habían varias implementaciones por ahí que muchos estaban usando, sin embargo al enviar nuestras aplicaciones a ser certificadas para publicarse en el Windows Store, estas podían recibir observaciones. Sin embargo ya la librería oficial escrita en C++ y que nos provee todo el poder y funcionalidad de SQLite está disponible para nuestras apps.

A continuación voy a hacer un ejemplo sencillo, paso a paso, mostrando como usarlo en una aplicación  Windows 8, este ejemplo está basado en el artículo publicado por Tim Heuer, una de mis fuentes recurrentes.

Aclaro y soy muy enfatica en ello, de la interfaz que use en el ejemplo, nada que ver con como debería ser una aplicación Windows 8, en este caso el ejemplo está más centrado en como usar SQLite.

En primer lugar debemos instalar la extensión que nos permite usar la librería de C++ creada por el equipo de Windows. La encontramos en Tools > Extensions and Updates


Luego buscamos los componentes en línea SQLite for Windows Runtime y la descargamos para que sea instalada en nuestra máquina.


Se nos pide una confirmación, que aceptamos para proceder con la instalación.


Visual Studio nos notifica que debemos reiniciar para que la extensión sea tomada.


Reiniciamos y abrimos nuestro proyecto y seleccionamos la opción de añadir referencias.


Debemos seleccionar SQLite y Microsoft Visual C++ Runtime para que la librería funcione correctamente.


En mi caso Visual Studio reportaba un error, ya que debía seleccionar una plataforma específica a pesar de que en realidad se nombran todas las posibles en el mismo mensaje de error.


Para corregir ingresamos a las propiedades del proyecto


Y seleccionamos en la sección Build, la plataforma de destino.


Ahora bien,  en este punto si tenemos el conocimiento podríamos acceder a la librería y usarla, sin embargo lo recomendado es buscar algún Wraper existente en C# como es mi caso, para no tener que lidiar con esto si no sabemos como hacerlo. Muchos de esos wraper se encuentran disponibles en NuGet. Si usamos VB debemos continuar los pasos hasta añadir el código del wraper, y compilar una librería en C# y luego referenciar esta desde nuestro proyecto VB.

Para iniciar la instalación del wraper verificamos en las extensiones si lo tenemos instalado y si no procedemos a hacerlo igual que se hizo con el SQLite.


Ahora bien ingresamos a NuGet para buscar un wrapper adecuado para nuestra aplicación.


El wrapper recomendado en el artículo de base de este post es sqlite-net, lo seleccionamos e instalamos.


Se nos pide seleccionar en que aplicación vamos a añadir el código, en este caso solo tengo un proyecto.


Lo que sucede es que añaden dos API a nuestro código, una de ellas es una API que usa  Async , palabra que si no entiendes a este instante te recomiendo estudiar en Channel 9 o en el Blog de Walter Novoa

En este post usaré Async, si quieres ver como usar la otra API, puedes ver el post de Tim Heuer o bien leer la documentación en español del Windows Developer Center


Para esto también es muy importante tener los conceptos de objetos y ORM claros en tu cabeza. De hecho empezamos nuestro ejemplo construyendo la clase que mapea con la estructura de nuestra tabla de ejemplo. No debemos confundir la clase con la tabla, la tabla de hecho no la veremos, sin embargo es la clase quien nos ayudará a que finalmente se cree la tabla (esto solo suena enredado si no tienes claros los conceptos que te mencioné)

La clase es sencilla, sin embargo podrás ver unos decoradores sobre ella

Otros decoradores pueden ser AutoIncrement, MaxLength(30).

Ahora creamos nuestra interfaz sencilla, les comparto el Document Outline para que se guien.


Tambien pueden ver el XAML del formulario. Solo recuerden que hacer una aplicación Windows 8 requiere de mucho más, pero es bueno iniciar desde lo fácil. 

Aprovecho para recomendarles que aprendan a manejar Blend, de verdad es una gran herramienta para abstraernos un poco del arduo trabajo de hacer XAML, sin embargo es igual de importante entender y saber modifical el XAML cuando algo va mal.


Ahora va el código del botón insertar como ven es bastante sencillo de usar cuando ya tienes el wrapper correcto.


Aquí la aplicación funcionando.


Luego tenemos el botón consultar que lleva un ListView los items de la base de datos, bastante sencillo tambien.


Aqui vemos la aplicación mostrando los nombres registrados.


Recuerden que hay mucho que hacer con respecto a las listas, y en XAML si sabemos manejar los enlaces correctamente podemos mostrar más información sin hacer más código, veamos un ejemplo de esto para terminar.

Pueden modificar el DataTemplate del ListView así:


Como mostraremos todo el objeto y no solo una parte de el modificamos el código.


Y de esta forma podemos tener una lista con más forma, que de hecho podemos editar mucho mejor si usamos Expression Blend.


Espero que este corto ejemplo les resulte de mucha utilidad. Nos vemos la próxima.

Sorey